Thursday 12 October 2017

Tribute to Winkie - completed.

Hi all.

Finally I finished the fat bottom bag I started making many weeks back. This bag took a lot of time to complete. I had to take help from a lot of people in knittingparadise, here and here in my blog before I could finish this project. I thank everyone who helped me with this bag.

This bag is crocheted to honour and celebrate the life and works of Wink, a very talented crocheter.

This is to tell Wink that she is still close to our hearts and that we miss her.

Fat bottom bag

Detachable brooch - embellishment
The bag is crocheted with Anchor knitting cotton and the handles are made with rope inside for added strenght. The bag is lined with cotton but I didn't make inside-pockets this time.

The embellishment for this bag is a detachable brooch, crocheted with embroidery floss, again from Anchor.

This bag took a lot of time but I am very happy with the results. Hope you too did. Please leave comments below and tell me what you think.

Monday 25 September 2017

Tribute to Wink - Help needed!

Hi all.

I was making this fat bottom bag in honour of crocheter Marinke, known to many as acreativebeing.


This is how far I have finished. As you see, the handles are to be attached. I searched everywhere for bamboo/wooden handles, but could not find any here, in this part of India. Tried online too, but didn't get any.

I need help with handles for this bag. Any suggestions are welcome. Please help me.

Tuesday 5 September 2017

A tribute to Wink.

Many of us know Wink through her blog acreativebeing. I too was inspired by her beautiful creations and have always appreciated the way she put together stitches and colours to create all the beautiful mandalas she made.

It is sad that she left us in June 2015. I, as a tribute to Wink had made a bag in 2016 inspired by her fat bottom bag. Though the pattern is not Wink's own, she made it a celebrated one among crocheters world wide. I made this bag in 2016.


This year too, I am making a similar one to celebrate the creativity of Winkie, though this is September already and is a little late for such a gesture. Still I felt I should do it and here it is!

Here is what it looked like six days back.


And this is two days back.


Today I lined my bag and started the single crochet rows at the top. Will share more pictures as soon as I complete the bag.

Thanks a lot for all those who supported me via Knittingparadise. It indeed is a great pleasure to have such a lovely bunch of people to support and encourage each other.

Monday 28 August 2017

My round cushion gets a cover, at last!

Hi all,

I had a cushion that dates back to, God alone knows when! It is a round one with green silk cover which faded over the years. My hubby seems to have some kind of emotional bondage to the cushion which made it impossible for me to throw it away. So I decided to give it a makeover!

I searched through the Net for something that fits my cushion and my yarn stash. (Obviously I din't want to buy more yarn!)

So after a long search,  I found something that fits the bill here. I tweaked the pattern slighty but tried to follow it as much as my requirement allowed and kept the colour changes as close with Haaknerd's as possible. I worked the cover with acrylic I already had and opted for a crocheted tie to avoid buttons poking at the targetted user, my hubby.

Here it is, the old cushion in new cover! It is raining in this part of India. So I had to take pictures indoors in artificial lighting, hence the poor picture quality.


Front of cushion cover
 The yarn is acrylic and is from my stash. I feel proud that I did not buy any yarn for this project too!


For the back of the cover, I thought about a fabric circle first. I was not sure how fabric and acrylic would get along together. So decided against it and made the back with something similar to the front.

I didn't want to duplicate the front, as I had something like a "second sock syndrome" overpowering me😁. So I settled for a granny circle for the back. Didn't have enough grey in a single shade to complete the back, hence switched colours thus using up those teeny weeny bits of grey I had lying around. That gives me a reason to start stocking up on grey (how could someone live without grey yarn!)
Granny circle back


 Front is a mix of many stitches including single crochet (sc), double crochet (dc) and cluster stitches.


Closeup of front
 The sides are made of half double crochet (hdc)
closeup of side
 The ties are chains (ch) with slip stitch (sl st) on them to strengthen them a bit.
Crocheted ties
If  anyone needs any help making this, please feel free to contact me.

My hubby is very happy to see the cushion back in service after a very long time.

Do you have anything you or a member of your family love so much that you can't throw it away? Share your stories with me.


Saturday 26 August 2017

Twine bag with brown handles - Pattern

Hi all.

I got a couple of requests for detailed pattern of this bag.


 Here it is:

(Please read the entire post before you start crocheting).

This bag is made starting from the base and as a single piece as I don't like to seam it later. The base is made as follows.

Base is made with two strands of twine held together. You could use any yarn or thread of your choice and a crochet hook in an appropriate size.


Ch 22. (20 ch +2 ch)
Round 1: 3 Dc in second ch from hook. 1 dc in rest till the last one. 6 dc in 20th ch. Turn work to work in the same ch on the other side. 1 dc in every ch till the first ch. 3 dc in first ch. sl st to the  2 ch.

Round 2: ch 2, dc in first dc, 5 dc in next dc, 1 dc each in next 21 dc, 5 dc in 22nd dc, 1 dc in 23rd dc, 5 dc in 24th dc, 1 dc in rest of the dcs, 5 dc in last dc, sl st to ch 2.

Round 3: ch 2, dc in first dc, 5 dc in next dc, 1 dc each in next 24 dc, 5 dc in 25th dc, 1 dc in each of the next 5 dc, 5 dc in 30th dc, 1 dc in each of the next 25 dc, 5 dc in the next dc, 1 dc each in the next 2 dc, sl st to join to ch 2. Fasten off by cutting one strand of thread and continue working with the one still attached to the base.


(The base of my bag measures 11 inches by 4 inches by end of Round 3. You could make more rounds if you want your base to be bigger)

Body: Now for this first round of body, we will work in the back loops only.

Round 1: ch 2. work an sc in the same space as the ch2. dc, sc in the third dc in back loop, dc, sc through out leaving one sp through out the round. join with sl st to the ch 2.

Round 2 (and all other rounds till the built-in handle is reached): ch 2, sc, *dc sc in the sc of the round below*, continue till end of round. sl st to the ch 2.

Repeat Round 2 26 more times (or more if you want the bag to be deeper or if you do not want the cut-in short handle I made)

Round 29: ch 2, dc sc 6 times as done till the previous round, ch 16, dc sc 12 times as done in previous round,  ch 16, dc sc in rest of the sc of previous round, join with sl st to ch 2.


(My bag is 10 inch deep from the cut-in handle. If you want a deeper bag, keep repeating Round 2. If you want your bag to be shallower, stop repeating Round 2 when you reach the desired depth)

Round 30: ch 2, dc sc in all sc till the chain is reached. On the ch, dc sc in the first ch, leave one ch sp, dc sc in next ch (3rd ch), leave 4th ch, dc sc in 5th ch and so forth till end of ch, continue dc sc on sc of previous row till beginning of next ch 16, on the ch, dc sc in first ch, leave 2nd ch, dc sc in 3rd ch, leave 4 th ch, dc sc in 5th ch and so forth till the end of ch, complete the rest of the round with dc sc in sc of previous round, sl to ch2. (This is the short handle)

Round 31, 32 and 33: Repeat Round 2.

This could be the last round if you do not want to keep your edge stiff.  I did a round of crab st (reverse sc) to make my edge look better and neater.

Optional Crab st border:

Round 34: ch reverse sc in all st across the round. sl st to ch1, cut yarn and weave in end.

Now to the bag handle:

I like my straps not getting saggy when i use the bag. So I used some cotton rope to strenghten the strap.

(I am a short person and like my bag to end just near my thighs. So I cut two pieces of rope 40 inches each and covered them with sc with brown Laura knitting cotton I had in my stash. Any yarn could be used, but I preferred cotton as the climate in this part of India is mostly warm and I want to use this bag even in summers).

Depending on the thickness of the material used to strengthen the strap, make ch to cover the thickness and join the last ch with the first one forming a loop. The strap is done as spirals without a ch up in rounds. Just keep crocheting in sc till the entire length of strap is covered. You need two straps for the same bag I made or just make one wider strap as you wish.

Attach the straps to the front and back of the bag marking 1.5 inches away from the built in handles if you have made them.

Embellish as you please. Use a flower or a large button or if you are like me, thread a couple of beads on some yarn and fix them to the bag and you are ready to take your bag out!

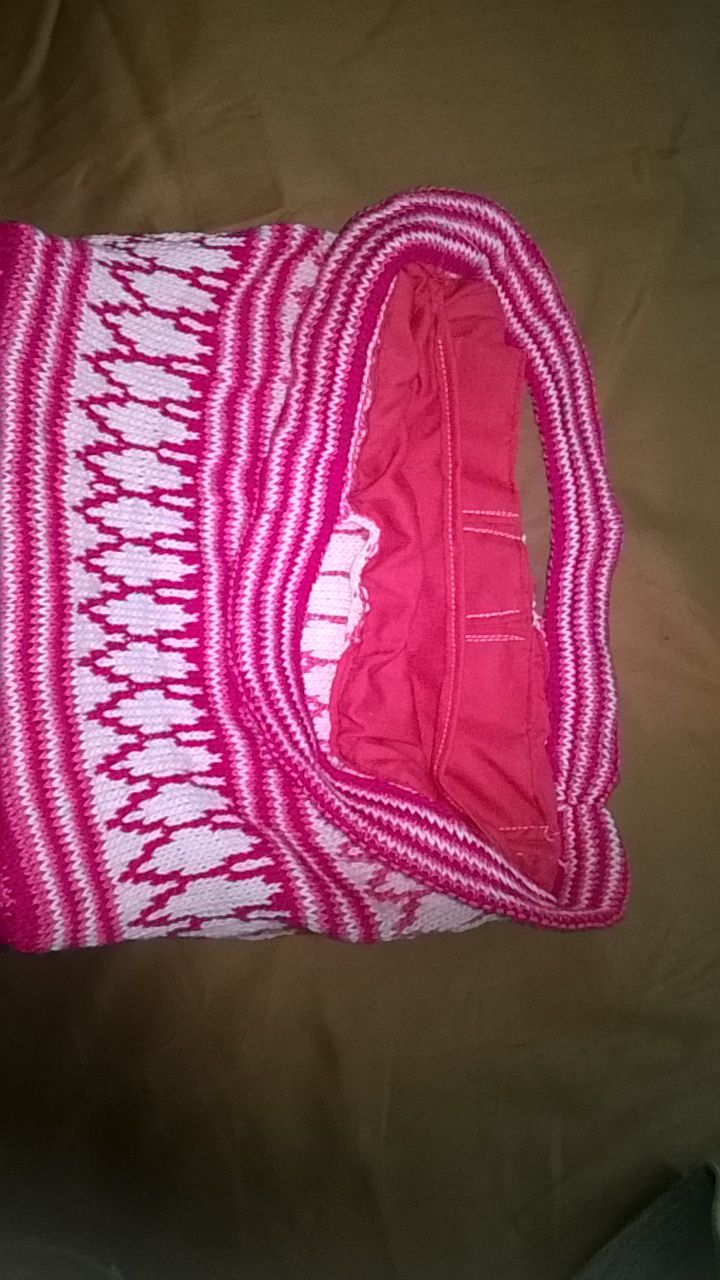
I lined my bag, but that again, is optional.

This is my first pattern for a bag and would like to know if there are any errors of typos. I did not test the pattern and hence there could be errors. Please let me know if there are any. I would help you if you get stuck at any point.

Hope to see what you make with this pattern. Please post pictures and do link back to my site if you use this pattern.

Another bag????!!!!!!

Yes, another BAG!

I confess, I am addicted to bags, all sorts of  bags. Every time I make a bag, I make up my mind that  this would be the last one. But I never keep that promise I make myself! I have some serious addiction, I should say!
As part of my stash busting efforts, I reorganised my yarn stash and sorted out all the yarns based on colour and material. That is when I noticed two packs full of twine in the bottom if my storage bin. How they skipped my sight so far is still a mystery. However that happened, I had to be honest with myself and own them up as part of my stash. They too had to be dealt with in a most deserving way. Thus I embarked on my twine-busting program! Made two bags out of the first pack of 12 balls, one of the with twine held two together which can be seen here.The second one is this bag, which is a mix of all the elements I wanted in a bag, soft colour, texture, depth, long straps that don't dig into the shoulder and short ones to hold my bag close to body when in a crowded place.

So, without much ado is present my twine bag V2!

TA DA!


Some details about the construction of the bag, for those who would like to know the details.

The thread/twine is held double for the double crochet (dc) base for strength.

The sides are done with single thread in Suzette stitch. (It is single crochet (sc) and dc done in the same chain for the first row and on the sc of  the previous row in rest of the rows.)

 The edge of the bag is finished with Crab stitch (Reverse sc).

The straps are made of Laura knitting cotton I bought many months back from Pradhan Embroidery Stores and leftover from the brown dress here. I would write a separate post on the dress someday.

The embellishment is detachable as I intend to throw my bag in the wash when it gets dirty, which it would, as I plan to use this bag a lot. The beads for the embellishment came from my beads collection, which too is getting out of control with some of the members almost in their teens!

I finished the bag in a week, with a couple of other projects thrown in between.

If anyboby likes to make this bag with twine or anyother yarn, I would only be happy to help.

NOTE: The pattern for this bag could be found here.

Friday 18 August 2017

A yarn trail and a bag....

Hi all.


As many of my crafty friends know, I am on trying to bring down my huge stash of yarn, which I successfully amassed over years. Shifting houses with such huge baggage was always difficult, but my hubby was always supportive and most of the time added to my stash and made it a bigger mess to deal with. He was always very helpful and has kept himself, and me too to large extent, sane when I approach him with which yarn should I use for a particular project and has even helped me plan where to attach handles for a bag and the embellishments for it. That reminds me of another bag I finished this week.

This is part of my stashbusting effort and is a beginning of many more in a series of stashbusters, hopefully.

This bag is made with twine (cotton thread used to tie things) and leftover acrylic I had. The twine reached me after a search for some jute, which i wanted very badly. This is the bag and the story behind the thread follows.


The story starts with a bag a friend of mine has. She was so happy to boast about that jute bag her daughter crocheted for her. Though I never liked the shape of the bag, I loved how jute looked lovely in simple shell stitch. I asked her shamelessly to help me get jute and we, despite her having a busy day decided to explore Trivandrum, Kerala, my home town, for some jute!

We tried every place imaginable and reached Chala market, Trivandrum. By then it was so late and she was getting calls from her family. Finally I decided to buy cotton thread we found at a shop there and I kept telling myself this is another eco-friendly option! How much ever I tried to convince myself, I could never muster the courage to whip up a hag with the thread. Every time I rearrange my stash/ dig up something from it, this yarn used to give me an accusative look, which I learnt to neglect over years (yes, years!)

Then finally last weekend, I decided the wait is over and started working on the bag. Though it took a while to decide on the colours of the doilies (Thank you hubby for the help) attached and the embellishment, I finished it in two days after lining it.

After this bag, I finished a gift for my grandpa, who would celebrate a birthday early next month. You can read about his last year's birthday here.

Do you have a story like this to share? Have you ever stumbled upon something so beautiful and irresistible like my friend's bag? Please share it as comments.


Monday 14 August 2017

Loooong time.........

Long time......

I was busy, very busy with shifting to a home on "earth". We moved from a 14th floor apartment to one on the ground floor. Packing and unpacking, settling down all ate into my precious crochet time!

Some 8 months later, we are still moving things around in the earnest desire to give me some more crafting space or more aptly, a space entirely for me to sit and craft, far from the  maddening noises made by my small family of an adorable teenager (? could teenagers ever be adorable????) and my loving hubby.

That aside, this home has been very supportive to my crochet / knit endeavors. I could complete lots of projects including a couple of crochet and cloth bags for my loving and ever demanding sister (love that about her!),

Tapestry crochet bag
Denim boho style clutch

Cloth pouch

Tapestry crochet bag
a top for a friend's daughter, Simba

Pullover for Simba

 a cardigan for my nephew due in October

Kimono Sweater
 and a matching pullover for his brother, sweet Sidharth
Boat neck pullover

and one with the yarn I had leftover from these to make a pullover for myself

Round neck knit top


 and a couple of other things.

Plastic canvas folder for Addu, my son
Plastic canvas folder
Knit and Filet crochet dress with sea shells
Tissue box cover
Bag with broomstitck lace detail
Crochet cap - Adult
Scrapbuster recycled storage containers
Beanie for kid - Stashbuster
Bikini coverup - Premium acrylic


The best thing that happened to me during this long absence from the blogosphere was that I learned knitting-and finished a stranded work knit bag, which  I consider an achievement as it is my first ever intermediate knitting project.

Stranded work knit bag

Realising that I could do both, knit and crochet, both to intermediate level, makes me very happy.

During this time, my yarn stash grew totally out of hand. It is difficult to resist the temptation to hoard on yarn and with a loving and supporting hubby like mine, who reaches for the wallet even before I decide on the colours I don't want, it is a war I never win! Any moment now, my stashwould takeover our bedroom. Though I am only partly responsible for this catastrophy, I promised myself two things -
1. I would NOT buy any more yarn till this is brought "under control"

2. I would NOT start any dream-project which requires a particular colour or certain weight of yarn that I do not have in my stash.

Hope I could stick to my promises. Wish me luck please.

If you have any idea how to keep yarn stash from growing any more, please leave a comment below. If you think as I do (What the heck, one more skien won't hurt), please let me know! Would like to hear from like minded "hoarders"πŸ˜πŸ˜ŠπŸ˜‰